Showing posts with label with. Show all posts

Create DialogFragment with AlertDialog Builder

| 0 comments |

Last post show a example of DialogFragment, to create dialog view in onCreateView(). This example show how to create Dialog using AlertDialog.Builder() in onCreateDialog().


MainActivity.java
package com.blogspot.android_er.androiddialogfragment;

import android.app.AlertDialog;
import android.app.Dialog;
import android.app.DialogFragment;
import android.app.Fragment;
import android.app.FragmentTransaction;
import android.content.DialogInterface;
import android.os.Bundle;
import android.support.v7.app.AppCompatActivity;
import android.view.View;
import android.widget.Button;
import android.widget.EditText;
import android.widget.Toast;

public class MainActivity extends AppCompatActivity {

EditText inputTextField;

@Override
protected void onCreate(Bundle savedInstanceState) {
super.onCreate(savedInstanceState);
setContentView(R.layout.activity_main);

inputTextField = (EditText)findViewById(R.id.inputtext);
Button btnOpen = (Button)findViewById(R.id.opendialog);
btnOpen.setOnClickListener(new View.OnClickListener() {
@Override
public void onClick(View v) {
showDialog();
}
});
}

void showDialog() {
FragmentTransaction ft = getFragmentManager().beginTransaction();
Fragment prev = getFragmentManager().findFragmentByTag("dialog");
if (prev != null) {
ft.remove(prev);
}
ft.addToBackStack(null);

String inputText = inputTextField.getText().toString();

DialogFragment newFragment = MyDialogFragment.newInstance(inputText);
newFragment.show(ft, "dialog");

}

public static class MyDialogFragment extends DialogFragment {

String mText;

static MyDialogFragment newInstance(String text) {
MyDialogFragment f = new MyDialogFragment();

Bundle args = new Bundle();
args.putString("text", text);
f.setArguments(args);

return f;
}

@Override
public Dialog onCreateDialog(Bundle savedInstanceState) {
mText = getArguments().getString("text");

return new AlertDialog.Builder(getActivity())
.setIcon(R.mipmap.ic_launcher)
.setTitle("Alert Dialog")
.setMessage(mText)
.setPositiveButton("OK",
new DialogInterface.OnClickListener() {
public void onClick(DialogInterface dialog, int whichButton) {
Toast.makeText(getActivity(), "OK", Toast.LENGTH_LONG).show();
}
}
)
.setNegativeButton("Cancel", null)
.create();
}

}
}


layout/activity_main.xml
<?xml version="1.0" encoding="utf-8"?>
<LinearLayout


android_layout_width="match_parent"
android_layout_height="match_parent"
android_padding="16dp"
android_orientation="vertical"
tools_context=".MainActivity"
android_background="#808080">

<TextView
android_layout_width="wrap_content"
android_layout_height="wrap_content"
android_layout_gravity="center_horizontal"
android_autoLink="web"
android_text="http://android-er.blogspot.com/"
android_textStyle="bold" />

<EditText
android_id="@+id/inputtext"
android_layout_width="match_parent"
android_layout_height="wrap_content"
android_hint="Type something"/>
<Button
android_id="@+id/opendialog"
android_layout_width="match_parent"
android_layout_height="wrap_content"
android_text="Open DialogFragment"
android_textAllCaps="false"/>
</LinearLayout>


Next:
- Implement interactive DialogFragment

Read More..

Lighting the way with BLE beacons

| 0 comments |

Posted by Chandu Thota, Engineering Director and Matthew Kulick, Product Manager

Just like lighthouses have helped sailors navigate the world for thousands of years, electronic beacons can be used to provide precise location and contextual cues within apps to help you navigate the world. For instance, a beacon can label a bus stop so your phone knows to have your ticket ready, or a museum app can provide background on the exhibit you’re standing in front of. Today, we’re beginning to roll out a new set of features to help developers build apps using this technology. This includes a new open format for Bluetooth low energy (BLE) beacons to communicate with people’s devices, a way for you to add this meaningful data to your apps and to Google services, as well as a way to manage your fleet of beacons efficiently.

Eddystone: an open BLE beacon format

Working closely with partners in the BLE beacon industry, we’ve learned a lot about the needs and the limitations of existing beacon technology. So we set out to build a new class of beacons that addresses real-life use-cases, cross-platform support, and security.

At the core of what it means to be a BLE beacon is the frame format—i.e., a language—that a beacon sends out into the world. Today, we’re expanding the range of use cases for beacon technology by publishing a new and open format for BLE beacons that anyone can use: Eddystone. Eddystone is robust and extensible: It supports multiple frame types for different use cases, and it supports versioning to make introducing new functionality easier. It’s cross-platform, capable of supporting Android, iOS or any platform that supports BLE beacons. And it’s available on GitHub under the open-source Apache v2.0 license, for everyone to use and help improve.

By design, a beacon is meant to be discoverable by any nearby Bluetooth Smart device, via its identifier which is a public signal. At the same time, privacy and security are really important, so we built in a feature called Ephemeral Identifiers (EIDs) which change frequently, and allow only authorized clients to decode them. EIDs will enable you to securely do things like find your luggage once you get off the plane or find your lost keys. We’ll publish the technical specs of this design soon.


Eddystone for developers: Better context for your apps

Eddystone offers two key developer benefits: better semantic context and precise location. To support these, we’re launching two new APIs. The Nearby API for Android and iOS makes it easier for apps to find and communicate with nearby devices and beacons, such as a specific bus stop or a particular art exhibit in a museum, providing better context. And the Proximity Beacon API lets developers associate semantic location (i.e., a place associated with a lat/long) and related data with beacons, stored in the cloud. This API will also be used in existing location APIs, such as the next version of the Places API.

Eddystone for beacon manufacturers: Single hardware for multiple platforms

Eddystone’s extensible frame formats allow hardware manufacturers to support multiple mobile platforms and application scenarios with a single piece of hardware. An existing BLE beacon can be made Eddystone compliant with a simple firmware update. At the core, we built Eddystone as an open and extensible protocol that’s also interoperable, so we’ll also introduce an Eddystone certification process in the near future by closely working with hardware manufacturing partners. We already have a number of partners that have built Eddystone-compliant beacons.

Eddystone for businesses: Secure and manage your beacon fleet with ease

As businesses move from validating their beacon-assisted apps to deploying beacons at scale in places like stadiums and transit stations, hardware installation and maintenance can be challenging: which beacons are working, broken, missing or displaced? So starting today, beacons that implement Eddystone’s telemetry frame (Eddystone-TLM) in combination with the Proximity Beacon API’s diagnostic endpoint can help deployers monitor their beacons’ battery health and displacement—common logistical challenges with low-cost beacon hardware.

Eddystone for Google products: New, improved user experiences

We’re also starting to improve Google’s own products and services with beacons. Google Maps launched beacon-based transit notifications in Portland earlier this year, to help people get faster access to real-time transit schedules for specific stations. And soon, Google Now will also be able to use this contextual information to help prioritize the most relevant cards, like showing you menu items when you’re inside a restaurant.

We want to make beacons useful even when a mobile app is not available; to that end, the Physical Web project will be using Eddystone beacons that broadcast URLs to help people interact with their surroundings.

Beacons are an important way to deliver better experiences for users of your apps, whether you choose to use Eddystone with your own products and services or as part of a broader Google solution like the Places API or Nearby API. The ecosystem of app developers and beacon manufacturers is important in pushing these technologies forward and the best ideas won’t come from just one company, so we encourage you to get some Eddystone-supported beacons today from our partners and begin building!

Update (July 16, 2015 11.30am PST) To clarify, beacons registered with proper place identifiers (as defined in our Places API) will be used in Place Picker. You have to use Proximity Beacon API to map a beacon to a place identifier. See the post on Googles Geo Developer Blog for more details.

Read More..

Connect With the World Around You Through Nearby APIs

| 0 comments |

Posted by Akshay Kannan, Product Manager

Mobile phones have made it easy to communicate with anyone, whether they’re right next to you or on the other side of the world. The great irony, however, is that those interactions can often feel really awkward when youre sitting right next to someone.

Today, it takes several steps -- whether it’s exchanging contact information, scanning a QR code, or pairing via bluetooth -- to get a simple piece of information to someone right next to you. Ideally, you should be able to just turn to them and do so, the same way you do in the real world.

This is why we built Nearby. Nearby provides a proximity API, Nearby Messages, for iOS and Android devices to discover and communicate with each other, as well as with beacons.

Nearby uses a combination of Bluetooth, Wi-Fi, and inaudible sound (using the device’s speaker and microphone) to establish proximity. We’ve incorporated Nearby technology into several products, including Chromecast Guest Mode, Nearby Players in Google Play Games, and Google Tone.

With the latest release of Google Play services 7.8, the Nearby Messages API becomes available to all developers across iOS and Android devices (Gingerbread and higher). Nearby doesn’t use or require a Google Account. The first time an app calls Nearby, users get a permission dialog to grant that app access.

A few of our partners have built creative experiences to show whats possible with Nearby.

Edjing Pro uses Nearby to let DJs publish their tracklist to people around them. The audience can vote on tracks that they like, and their votes are updated in realtime.

Trello uses Nearby to simplify sharing. Share a Trello board to the people around you with a tap of a button.

Pocket Casts uses Nearby to let you find and compare podcasts with people around you. Open the Nearby tab in Pocket Casts to view a list of podcasts that people around you have, as well as podcasts that you have in common with others.

Trulia uses Nearby to simplify the house hunting process. Create a board and use Nearby to make it easy for the people around you to join it.

To learn more, visit developers.google.com/nearby?utm_campaign=nearby-api-714&utm_source=gdbc&utm_medium=blog.

Read More..

Accelerate business growth with Startup Launch Launchpad Online

| 0 comments |
Last June, we launched Startup Launch, a program to help tech startups at all stages become successful on the Google Developers platform and open-source technologies. So far, we’ve helped more than 3,000 entrepreneurs transform their ideas into burgeoning websites, services, apps, and products in 150 countries. Hear some of their stories from the Czech Republic, Poland, Kenya, Brazil and Mexico in our Global Spotlight playlist.

Launchpad Online

Today, we’re bringing the program to a wider audience with a new web series called Launchpad Online, to share knowledge based on questions we’ve had from entrepreneurs using our products. The series kicks off with technical instruction from Developer Advocate Wesley Chun on getting started with Google developer tools and APIs and over time will expand to include topics covering design and distribution.
This show accompanies our established "Root Access" and “How I:” series, which bring perspective and best practices to developers and entrepreneurs on a weekly basis.

Launchpad Events

Launchpad Online follows the curriculum set out by our ongoing Launchpad events, week-long bootcamps for startups in select cities. In 2014, over 200 startups participated in events in Tel Aviv, London, Rio de Janeiro, Berlin, and Paris, which consisted of workshops on product strategy, UX/UI, engineering, digital marketing and presentation skills. Check out our videos covering recent events in Paris and Berlin here.

You’re invited

In addition to events and online content, the program offers product credits to participants, from $500 of Cloud Platform and AdWords credits to startups who are just starting off, up to Google’s Cloud Platform startup offer of $100,000 USD in Cloud Credit offerings to startups ready to scale their business. You can apply for these benefits, and to be selected for future Launchpad events, at g.co/launch. Startup Launch runs in conjunction with our Google Business Groups and Google Developer Groups on the ground. Together, these communities have hosted more than 5,000 events in 543 cities and 104 countries this year, helping startups connect with other developers and entrepreneurs. Attend an upcoming business or developer event near you. We hope to see you there!

Posted by Amir Shevat, Global Startup Outreach Program Manager, Google Developer Relations
Read More..

Schools share their tips for success with Chromebooks

| 0 comments |


(Cross-posted on the Google for Education Blog.)

Editors note: As educators in North America begin to prepare for the 2015/16 school year, we thought this would be a good time to pull together the best tips we shared in the last year from schools using Chromebooks. If you’ll be at ISTE 2015 next week in Philly, come see us in the Expo Hall at space #1808. We’ll have a range of Chromebooks to demo and over 50 sessions in our teaching theater. If you won’t be there, you can follow along at #ISTE2015 and @GoogleforEdu for the highlights and news.

Schools across North America are choosing Chromebooks as devices to support teaching and learning. Districts continue to invest in Chromebooks, purchasing more devices as they continue to see success. A few examples: Charlotte-Mecklenburg Schools in North Carolina now use 83,000 devices, Milwaukee Public Schools now use 38,000 and we’re happy to announce that Arlington Independent School District in Texas recently purchased 17,000 Chromebooks. We gathered tips from experienced districts like these to help school leaders prepare for success in the upcoming school year.

1. Understand teachers’ needs
Success begins with asking teachers what they need and truly listening to their answers. New York City Chief Information Officer Hal Friedlander shared the importance of listening to and understanding the needs of teachers. “We treat schools as customers and engage them as advocates of the technology,” Friedlander says. “The educators who live in the community and teach students every day have the best ideas about what they need in technology, not a guy like me who works at the 30,000-foot view.” It’s a logical place to start, but too often people rush this step.

2. Equip staff with advanced training
Fulfilling teachers’ needs also involves training — preparing them with the tools they need to use technology effectively. Back in November, in the midst of dispatching 32,000 Chromebooks, Chesterfield Public Schools Executive Director of Technology Adam Sedlow shared tips for a successful Chromebook deployment, emphasizing the importance of professional development. Interestingly, the district didn’t require every teacher to attend training — instead they created an optional two-day experience called Camp Chromebook. Because the training was crafted to be fun and engaging, the 300 spots filled up in minutes. Once school started, the trained teachers helped their colleagues who couldn’t attend Camp Chromebook.

3. Plan a phased rollout
Over the past year, school leaders have taught us that planning counts. During a panel at Education on Air, three leaders shared what they’ve learned about successful IT rollouts. A common theme: be thoughtful about planning each phase. Hillsborough Public Schools Director of Technology Joel Handler shared that for his New Jersey district, this meant organizing a pilot phase with outstanding teachers who were respected by their peers as instructional leaders. Valerie Truesdale, Chief of Technology, Personalization & Engagement at Charlotte-Mecklenburg Schools, shared that her district used Chromebooks in middle school because data showed them this age group was the place with most need.

4. Encourage risk-taking and innovation
Throughout the year, leaders echoed the importance of encouraging staff to take risks. Joel Handler put it well “if you aren’t failing, then you aren’t taking enough risks.” Outside experts agree. Laszlo Bock, Google’s head of HR, cited the need for risk-taking and failure as one of his four “work rules for school”  lessons included in his recent book "Work Rules." Laszlo shared that “failure actually isn’t failure, it’s the single best learning opportunity we have." Changing culture isn’t always easy, but many educators are doing it well. Ryan Bretag, Chief Innovation Officer at Glenbrook High School District 225 in Illinois, shared a few practical tips on how to create the conditions for change in schools.

What tips did we miss? Share your tips for success with Chromebooks by using #GoogleEdu. If you’re looking for support in preparing to deploy Chromebooks, check out our Google for Education trainer directory. Although Chromebooks are easy to set up and use, we know that many people like to engage a trainer to get started. On our site, you’ll find a range of organizations that make it their full-time job to support schools with edtech.
Read More..

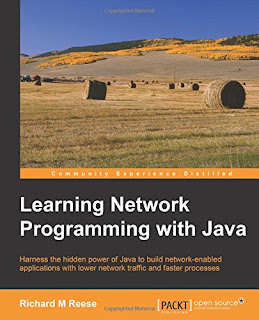
Learning Network Programming with Java

| 0 comments |
Learning Network Programming with Java

Key Features
  • Learn to deliver superior server-to-server communication through the networking channels
  • Gain expertise of the networking features of your own applications to support various network architectures such as client/server and peer-to-peer
  • Explore the issues that impact scalability, affect security, and allow applications to work in a heterogeneous environment
Book Description
Network-aware applications are becoming more prevalent and play an ever-increasing role in the world today. Connecting and using an Internet-based service is a frequent requirement for many applications. Java provides numerous classes that have evolved over the years to meet evolving network needs. These range from low-level socket and IP-based approaches to those encapsulated in software services.

This book explores how Java supports networks, starting with the basics and then advancing to more complex topics. An overview of each relevant network technology is presented followed by detailed examples of how to use Java to support these technologies.

We start with the basics of networking and then explore how Java supports the development of client/server and peer-to-peer applications. The NIO packages are examined as well as multitasking and how network applications can address practical issues such as security.

A discussion on networking concepts will put many network issues into perspective and let you focus on the appropriate technology for the problem at hand. The examples used will provide a good starting point to develop similar capabilities for many of your network needs.

What you will learn
  • Connect to other applications using sockets
  • Use channels and buffers to enhance communication between applications
  • Access network services and develop client/server applications
  • Explore the critical elements of peer-to-peer applications and current technologies available
  • Use UDP to perform multicasting
  • Address scalability through the use of core and advanced threading techniques
  • Incorporate techniques into an application to make it more secure
  • Configure and address interoperability issues to enable your applications to work in a heterogeneous environment
About the Author
Richard M Reese has worked in both industry and academia. For 17 years, he worked in the telephone and aerospace industries, serving in several capacities, including research and development, software development, supervision, and training. He currently teaches at Tarleton State University, where he has the opportunity to apply his years of industry experience to enhance his teaching.

Richard has written several Java books and a C Pointer book. He uses a concise and easy-to-follow approach to topics at hand. His Java books have addressed EJB 3.1, updates to Java 7 and 8, certification, functional programming, jMonkeyEngine, and natural language processing.

Table of Contents
  1. Getting Started with Network Programming
  2. Network Addressing
  3. NIO Support for Networking
  4. Client/Server Development
  5. Peer-to-Peer Networks
  6. UDP and Multicasting
  7. Network Scalability
  8. Network Security
  9. Network Interoperability


Read More..

Retail in 2016 Looking ahead with our customers and partners at Retail’s Big Show

| 0 comments |


Coming out of the holiday rush, retailers are already thinking about the year ahead and how to compete in 2016 and beyond. We’re headed to the industry’s largest global event, Retail’s Big Show (January 17-20 in New York City), hosted by the National Retail Federation (NRF), to talk about just that. With more than 30,000 attendees, Retail’s Big Show is the hub of conversations about retail innovation. Many of our own customers will be there, and we look forward to hearing how they’re evolving for the digital age.

Thousands of the world’s top retailers rely on Google Apps, Chrome, Google Maps, Google Cloud Platform and Google Search to work better, wherever they are — from designing the latest trends to selling must-have gadgets (see top tips from our retail customers).

With customized retail tools and APIs, Google helps retailers to master fast fashion, create leaner supply chains and gain a better understanding of customer data. Retailers can grow revenue, reduce costs and innovate quickly.

On the first day of Retail’s Big Show, our partner PricewaterhouseCoopers (PwC) will host a panel of retailers innovating with Google Apps: Chico’s, Kohl’s, OVS SpA and Waitrose. These customers will discuss how retail CIOs are leading organizational transformation and how their teams transitioned to Google Apps — which reduced costs, strengthened customer experience, shortened product launch cycles and improved how their teams work together on a global scale.

We’re continuing to build an ecosystem of solutions that support the next generation of digital business in retail — including partnerships with technologies for retail workforce management, digital signage, and merchandising, planning, operations and supply chain. Googlers will be hanging out in partner booths at Retail’s Big Show to talk more about these integrations. Look for us in the booths for Kronos Software, Scala and JDA Software to learn about our joint solutions and offerings, and stay tuned for future blog posts from each of these partners and their Google for Work integration stories.

If you’re planning to attend Retail’s Big Show, we hope to see you at the Connected Retailing panel on January 17 at 3:15 p.m. in Hall E, 1E 07.
Read More..

Beacons the Internet of things and more Coffee with Timothy Jordan

| 0 comments |

Posted by Laurence Moroney, Developer Advocate

In this episode of Coffee With a Googler, Laurence meets with Developer Advocate Timothy Jordan to talk about all things Ubiquitous Computing at Google. Learn about the platforms and services that help developers reach their users wherever it makes sense.

We discuss Brillo, which extends the Android Platform to Internet of Things embedded devices, as well as Weave, which is a services layer that helps all those devices work together seamlessly.

We also chat about beacons and how they can give context to the world around you, making the user experience simpler. Traditionally, users need to tell you about their location, and other types of context. But with beacons, the environment can speak to you. When it comes to developing for beacons, Timothy introduces us to Eddystone, a protocol specification for BlueTooth Low Energy (BLE) beacons, the Proximity Beacon API that allows developers to register a beacon and associate data with it, and the Nearby Messages API which helps your app sight and retrieve data about nearby beacons.

Timothy and his team have produced a new Udacity series on ubiquitous computing that you can access for free! Take the course to learn more about ubiquitous computing, the design paradigms involved, and the technical specifics for extending to Android Wear, Google Cast, Android TV, and Android Auto.

Also, dont forget to join us for a ubiquitous computing summit on November 9th & 10th in San Francisco. Sign up here and well keep you updated.

Read More..

Introducing the Senior Web Developer Nanodegree Program with Udacity

| 0 comments |

Posted by Sarah Clark, Program Manager, Google Developer Training

What do you need to stand out from the crowd of web developers, and ultimately, land that perfect job?

We asked ourselves that same question and decided to help by introducing the Senior Web Developer Nanodegree. Built in collaboration with Udacity, this online program is designed to teach you the tools, frameworks, and techniques needed to write robust code for progressive web applications that are secure and easy to use. Spending about 10 hours a week, most students can earn this Nanodegree credential in 9-12 months at a cost of $200 per month with 50% returned upon completion.

Along the way, you will also learn how to integrate new technologies, such as Service Worker and Web Components, and work extensively with Gulp and other tools. You’ll hear from Google experts, such as Ido Green, Jake Archibald (co-author of the Service Worker spec), Luke Wroblewski (author and strategist), Paul Bakaus (Studio 5 CTO, Zynga) and Alice Boxhall (author of the Chrome accessibility developer tools).

How can you get started? There are two different ways to participate. One option is the paid Nanodegree program, which includes code-level project reviews and feedback, coaching, support from a cohort of peers, building a portfolio of work, and career support services. The second option is entirely free and includes the same instructional courses, quizzes and projects individually, which you can take at your own pace.

For more details, and to be notified when enrollment opens, check out udacity.com/googlewebdev.

Read More..

RecyclerView CardView example with Button

| 0 comments |

This example work on last example of "Gallery-like RecyclerView + CardView example" to show how to add a button and OnClickListener in RecyclerView + CardView. A ImageButton is add over the photo on each cell. Once user click on the ImageButton, the corresponding OnClickListener, to show the info of the corresponding photo.


Modify layout/layout_cardview.xml to add a ImageButton.
<?xml version="1.0" encoding="utf-8"?>
<android.support.v7.widget.CardView


android_layout_width="match_parent"
android_layout_height="wrap_content"
android_layout_margin="10dp"
card_view_cardCornerRadius="5sp"
card_view_cardElevation="5sp">

<FrameLayout
android_layout_width="match_parent"
android_layout_height="wrap_content">

<ImageView
android_id="@+id/item_image"
android_layout_width="wrap_content"
android_layout_height="wrap_content" />
<ImageButton
android_id="@+id/buttonInfo"
android_layout_width="wrap_content"
android_layout_height="wrap_content"
android_src="@android:drawable/ic_menu_info_details"
android_background="#00ffffff"/>


</FrameLayout>
</android.support.v7.widget.CardView>


Modify MyRecyclerViewAdapter.java:
- get the reference to the Button in the constructor of RecyclerView.ViewHolder.
- implement the OnClickListener in onBindViewHolder() of MyRecyclerViewAdapter.
package com.blogspot.android_er.androidgallery;

import android.content.Context;
import android.graphics.Bitmap;
import android.graphics.BitmapFactory;
import android.net.Uri;
import android.support.v7.widget.CardView;
import android.support.v7.widget.RecyclerView;
import android.view.LayoutInflater;
import android.view.View;
import android.view.ViewGroup;
import android.widget.ImageButton;
import android.widget.ImageView;
import android.widget.Toast;

import java.io.FileNotFoundException;
import java.util.ArrayList;
import java.util.List;

public class MyRecyclerViewAdapter extends RecyclerView.Adapter<MyRecyclerViewAdapter.ItemHolder>{

private List<Uri> itemsUri;
private LayoutInflater layoutInflater;
private Context context;
private OnItemClickListener onItemClickListener;
MainActivity mainActivity;

public MyRecyclerViewAdapter(Context context, MainActivity mainActivity){
this.context = context;
layoutInflater = LayoutInflater.from(context);
itemsUri = new ArrayList<Uri>();

this.mainActivity = mainActivity;
}

@Override
public MyRecyclerViewAdapter.ItemHolder onCreateViewHolder(ViewGroup parent, int viewType) {
CardView itemCardView = (CardView)layoutInflater.inflate(R.layout.layout_cardview, parent, false);
return new ItemHolder(itemCardView, this);
}

@Override
public void onBindViewHolder(MyRecyclerViewAdapter.ItemHolder holder, final int position) {
final Uri targetUri = itemsUri.get(position);
holder.setItemUri(targetUri.getPath());

if (targetUri != null){

try {
//! CAUTION !
//Im not sure is it properly to load bitmap here!
holder.setImageView(loadScaledBitmap(targetUri));

holder.btnInfo.setOnClickListener(new View.OnClickListener() {
@Override
public void onClick(View v) {
Toast.makeText(context,
"btnInfo clicked: "
+ "position:" + position + " "
+ targetUri.getLastPathSegment(),
Toast.LENGTH_LONG).show();
}
});


} catch (FileNotFoundException e) {
e.printStackTrace();
}
}
}

/*
reference:
Load scaled bitmap
http://android-er.blogspot.com/2013/08/load-scaled-bitmap.html
*/
private Bitmap loadScaledBitmap(Uri src) throws FileNotFoundException {

//display the file to be loadScaledBitmap(),
//such that you can know how much work on it.
mainActivity.textInfo.append(src.getLastPathSegment() + " ");

// required max width/height
final int REQ_WIDTH = 150;
final int REQ_HEIGHT = 150;

Bitmap bm = null;

// First decode with inJustDecodeBounds=true to check dimensions
final BitmapFactory.Options options = new BitmapFactory.Options();
options.inJustDecodeBounds = true;
BitmapFactory.decodeStream(context.getContentResolver().openInputStream(src),
null, options);

// Calculate inSampleSize
options.inSampleSize = calculateInSampleSize(options, REQ_WIDTH,
REQ_HEIGHT);

// Decode bitmap with inSampleSize set
options.inJustDecodeBounds = false;
bm = BitmapFactory.decodeStream(
context.getContentResolver().openInputStream(src), null, options);

return bm;
}

public int calculateInSampleSize(BitmapFactory.Options options,
int reqWidth, int reqHeight) {
// Raw height and width of image
final int height = options.outHeight;
final int width = options.outWidth;
int inSampleSize = 1;

if (height > reqHeight || width > reqWidth) {

// Calculate ratios of height and width to requested height and
// width
final int heightRatio = Math.round((float) height
/ (float) reqHeight);
final int widthRatio = Math.round((float) width / (float) reqWidth);

// Choose the smallest ratio as inSampleSize value, this will
// guarantee
// a final image with both dimensions larger than or equal to the
// requested height and width.
inSampleSize = heightRatio < widthRatio ? heightRatio : widthRatio;
}

return inSampleSize;
}

@Override
public int getItemCount() {
return itemsUri.size();
}

public void setOnItemClickListener(OnItemClickListener listener){
onItemClickListener = listener;
}

public OnItemClickListener getOnItemClickListener(){
return onItemClickListener;
}

public interface OnItemClickListener{
public void onItemClick(ItemHolder item, int position);
}

public void add(int location, Uri iUri){
itemsUri.add(location, iUri);
notifyItemInserted(location);
}

public void clearAll(){
int itemCount = itemsUri.size();

if(itemCount>0){
itemsUri.clear();
notifyItemRangeRemoved(0, itemCount);
}
}


public static class ItemHolder extends RecyclerView.ViewHolder implements View.OnClickListener{

private MyRecyclerViewAdapter parent;
private CardView cardView;
ImageView imageView;
String itemUri;

ImageButton btnInfo;

public ItemHolder(CardView cardView, MyRecyclerViewAdapter parent) {
super(cardView);
itemView.setOnClickListener(this);
this.cardView = cardView;
this.parent = parent;
imageView = (ImageView) cardView.findViewById(R.id.item_image);
btnInfo = (ImageButton) cardView.findViewById(R.id.buttonInfo);
}

public void setItemUri(String itemUri){
this.itemUri = itemUri;
}

public String getItemUri(){
return itemUri;
}

public void setImageView(Bitmap bitmap){
imageView.setImageBitmap(bitmap);
}

@Override
public void onClick(View v) {
final OnItemClickListener listener = parent.getOnItemClickListener();
if(listener != null){
listener.onItemClick(this, getLayoutPosition());
//or use
//listener.onItemClick(this, getAdapterPosition());
}
}
}
}


~ More example of RecyclerView + CardView.


Read More..

Custom Spinner with text color

| 0 comments |
Modify from old post "Custom ArrayAdapter for Spinner, with custom icons", change to make the custom Spinner with selected text color.


Add a custom spinner in layout, layout/activity_main.xml.
<?xml version="1.0" encoding="utf-8"?>
<LinearLayout

android_layout_width="match_parent"
android_layout_height="match_parent"
android_padding="16dp"
android_orientation="vertical"
tools_context="com.blogspot.android_er.androidcustomspinner.MainActivity">

<TextView
android_layout_width="wrap_content"
android_layout_height="wrap_content"
android_layout_gravity="center_horizontal"
android_autoLink="web"
android_text="http://android-er.blogspot.com/"
android_textStyle="bold" />
<Spinner
android_id="@+id/spinner"
android_layout_width="match_parent"
android_layout_height="wrap_content" />
</LinearLayout>


layout/row.xml
<?xml version="1.0" encoding="utf-8"?>
<LinearLayout
android_layout_width="fill_parent"
android_layout_height="wrap_content"
android_orientation="horizontal">

<ImageView
android_id="@+id/icon"
android_layout_width="wrap_content"
android_layout_height="wrap_content"
android_src="@mipmap/ic_launcher" />

<TextView
android_id="@+id/weekofday"
android_layout_width="wrap_content"
android_layout_height="wrap_content"
android_textSize="20dp"
android_textStyle="bold"
android_textColor="#0000F0"/>
</LinearLayout>

MainActivity.java
package com.blogspot.android_er.androidcustomspinner;

import android.content.Context;
import android.os.Bundle;
import android.support.v7.app.AppCompatActivity;
import android.view.LayoutInflater;
import android.view.View;
import android.view.ViewGroup;
import android.widget.ArrayAdapter;
import android.widget.Spinner;
import android.widget.TextView;

public class MainActivity extends AppCompatActivity {

String[] DayOfWeek = {"Sunday", "Monday", "Tuesday",
"Wednesday", "Thursday", "Friday", "Saturday"};

@Override
protected void onCreate(Bundle savedInstanceState) {
super.onCreate(savedInstanceState);
setContentView(R.layout.activity_main);
Spinner mySpinner = (Spinner)findViewById(R.id.spinner);
mySpinner.setAdapter(new MyCustomAdapter(MainActivity.this, R.layout.row, DayOfWeek));
}

public class MyCustomAdapter extends ArrayAdapter<String> {

public MyCustomAdapter(Context context, int textViewResourceId,
String[] objects) {
super(context, textViewResourceId, objects);
}

@Override
public View getDropDownView(int position, View convertView,
ViewGroup parent) {
return getCustomView(position, convertView, parent);
}

@Override
public View getView(int position, View convertView, ViewGroup parent) {
return getCustomView(position, convertView, parent);
}

public View getCustomView(int position, View convertView, ViewGroup parent) {
LayoutInflater inflater=getLayoutInflater();
View row=inflater.inflate(R.layout.row, parent, false);
TextView label=(TextView)row.findViewById(R.id.weekofday);
label.setText(DayOfWeek[position]);

if(position == 0){
label.setTextColor(0xFFF00000);
}

return row;
}
}
}


Read More..

Launching Salesforce Lightning with a global community a live event and Hangouts

| 0 comments |


Editors note: Today we hear from Sarah Franklin, VP of Admin Marketing at Salesforce, the leader in enterprise cloud computing and the sixth largest software company in the world. See how the company brought its community together and announced a recent product release using Google Hangouts. 

It’s not every day that we have the opportunity to bring together people from 119 locations across the globe. The Salesforce marketing team put our heads together to decide how to announce Salesforce Lightning — a metadata-driven platform that is highly customizable, and empowers people to work faster and smarter — differently than previous product releases. We decided to focus on what’s always been at the center of our company: our customers. For us, the solution was simple and collaborative. We chose Google Hangouts to introduce Lightning, so we could share this exciting announcement with our community of developers and users in 20 countries via live video.

We chose Hangouts because we wanted to show our community that we’re committed to using innovative tools. We’d already been using Hangouts in a variety of ways, such as connecting with colleagues in different offices (and sending each other emojis) and hosting webinars with our admin community, so we knew it was a great choice to bring many people together from around the world.

Whether it was 7 a.m. or midnight in their local timezone, people gathered at universities, community centers and local pubs to join the product launch. The day after our announcement, we also hosted a second private Hangout with over 200 people across Europe, the Middle East and Africa in case they missed the launch due to timing. These events created a deeper sense of camaraderie among an already strong community. We sent our community leaders a webcam and tripod, so it was easy and cost effective to get a group together since all they needed was an internet connection. Hangouts gave us the opportunity to encourage dialogue between admins, developers, partners and users in a fun and immediate way.

Many companies measure the success of a product launch based on the press they receive or the number of website visits they get in a single day. We flipped that. Our goal was how could we involve our community and put our customers at the center of this launch. We defined success by the number of customers we involved. More than 19,000 people from our community, from Bangalore to Tokyo to New York City to Paris and hundreds of places in between, tuned in to join the launch.

Our executives were floored when they saw people from all around the world on the screen. We overcame the language barrier by having translators onsite in some of the non-English speaking countries to make sure everyone felt included. We created a personal connection with customers who spoke different languages and brought together engineers, users, executives and the marketing team who have a common passion for our customers’ success.

By focusing on forward-looking technology, we hosted an event that made more than 19,000 people feel like they were in the same room. And with our core focus on connecting companies to their customers, we couldnt think of a better way to introduce our products to the world than with Hangouts.
Read More..

Custom AlertDialog with EditText and ImageView build with AlertDialog Builder

| 0 comments |

Example to builld AlertDialog with EditText and ImageView, build with AlertDialog.Builder.


Create layout/dialog_layout.xml, to define the layout of the dialog.
<?xml version="1.0" encoding="utf-8"?>
<LinearLayout

android_orientation="vertical"
android_layout_width="match_parent"
android_layout_height="match_parent">

<ImageView
android_id="@+id/image"
android_layout_width="wrap_content"
android_layout_height="wrap_content" />
<TextView
android_layout_width="match_parent"
android_layout_height="wrap_content"
android_text="This is custom layout in custom dialog"/>
<EditText
android_id="@+id/dialogEditText"
android_layout_width="match_parent"
android_layout_height="wrap_content" />

</LinearLayout>

MainActivity.java
package com.blogspot.android_er.androidcustomalertdialog;

import android.app.AlertDialog;
import android.content.DialogInterface;
import android.graphics.drawable.Drawable;
import android.os.Bundle;
import android.support.v7.app.AppCompatActivity;
import android.view.LayoutInflater;
import android.view.View;
import android.widget.Button;
import android.widget.EditText;
import android.widget.ImageView;
import android.widget.TextView;
import android.widget.Toast;

public class MainActivity extends AppCompatActivity {

Button btnOpenDialog;
TextView textInfo;

@Override
protected void onCreate(Bundle savedInstanceState) {
super.onCreate(savedInstanceState);
setContentView(R.layout.activity_main);

btnOpenDialog = (Button)findViewById(R.id.opendialog);
textInfo = (TextView)findViewById(R.id.info);

btnOpenDialog.setOnClickListener(new View.OnClickListener() {
@Override
public void onClick(View v) {
openDialog();
}
});
}

private void openDialog(){
LayoutInflater inflater = LayoutInflater.from(MainActivity.this);
View subView = inflater.inflate(R.layout.dialog_layout, null);
final EditText subEditText = (EditText)subView.findViewById(R.id.dialogEditText);
final ImageView subImageView = (ImageView)subView.findViewById(R.id.image);
Drawable drawable = getResources().getDrawable(R.mipmap.ic_launcher);
subImageView.setImageDrawable(drawable);

AlertDialog.Builder builder = new AlertDialog.Builder(this);
builder.setTitle("AlertDialog");
builder.setMessage("AlertDialog Message");
builder.setView(subView);
AlertDialog alertDialog = builder.create();

builder.setPositiveButton("OK", new DialogInterface.OnClickListener() {
@Override
public void onClick(DialogInterface dialog, int which) {
textInfo.setText(subEditText.getText().toString());
}
});

builder.setNegativeButton("Cancel", new DialogInterface.OnClickListener() {
@Override
public void onClick(DialogInterface dialog, int which) {
Toast.makeText(MainActivity.this, "Cancel", Toast.LENGTH_LONG).show();
}
});

builder.show();
}
}


layout/activity_main.xml
<?xml version="1.0" encoding="utf-8"?>
<LinearLayout


android_layout_width="match_parent"
android_layout_height="match_parent"
android_padding="16dp"
android_orientation="vertical"
tools_context=".MainActivity">

<TextView
android_layout_width="wrap_content"
android_layout_height="wrap_content"
android_layout_gravity="center_horizontal"
android_autoLink="web"
android_text="http://android-er.blogspot.com/"
android_textStyle="bold" />

<Button
android_id="@+id/opendialog"
android_layout_width="match_parent"
android_layout_height="wrap_content"
android_text="Open Dialog"/>

<TextView
android_id="@+id/info"
android_layout_width="match_parent"
android_layout_height="wrap_content"
android_textSize="20dp"
android_textStyle="bold"/>
</LinearLayout>

Read More..

We throw pie with a little help from our friends

| 0 comments |

Posted by Jon Simantov, Fun Propulsion Labs at Google

Originally posted to the Google Open Source blog

Fun Propulsion Labs at Google* is back today with some new releases for game developers. We’ve updated Pie Noon (our open source Android TV game) with networked multi-screen action, and we’ve also added some delicious new libraries we’ve been baking since the original release: the Pindrop audio library and the Motive animation system.

Pie Noon multi-screen action

Got an Android TV and up to 4 friends with Android phones or tablets? You’re ready for some strategic multi-player mayhem in this updated game mode. Plan your next move in secret on your Android phone: will you throw at an opponent, block an incoming attack, or take the risky approach and wait for a larger pie? Choose your target and action, then watch the Android TV to see what happens!


We used the NearbyConnections API from the most recent version of Google Play Games services to easily connect smartphones to your Android TV and turn our original Pie Noon party game into a game of turn-based strategy. You can grab the latest version of Pie Noon from Google Play to try it out, or crack open the source code and take a look at how we used FlatBuffers to encode data across the network in a fast, portable, bandwidth-efficient way.

Pindrop: an open source game audio library

Pindrop is a cross-platform C++ library for managing your in-game audio. It supports cross compilation to Android, Linux, iOS and OSX. An early version of this code was part of the first Pie Noon release, but it’s now available as a separate library that you can use in your own games. Pindrop handles loading and unloading sound banks, tracking sound locations and listeners, prioritization of your audio channels, and more.

Pindrop is built on top of several other pieces of open source technology:

  • SDL Mixer is used as a backend for actually playing the audio.
  • The loading of data and configuration files is handled by our serialization library, FlatBuffers.
  • Our own math library, MathFu, is used for a number of under-the-hood calculations.

You can download the latest open source release from our GitHub page. Documentation is available here and a sample project is included in the source tree. Please feel free to post any questions in our discussion list.

Motive: an open source animation system

The Motive animation system can breathe life into your static scenes. It does this by applying motion to simple variables. For example, if you’d like a flashlight to shine on a constantly-moving target, Motive can animate the flashlight so that it moves smoothly yet responsively.

Motive animates both spline-based motion and procedural motion. These types of motion are not technically difficult, but they are artistically subtle. Its easy to get the math wrong. Its easy to end up with something that moves as required but doesnt quite feel right. Motive does the math and lets you focus on the feeling.

Motive is scalable. Its designed to be extremely fast. It also has a tight memory footprint -- smaller than traditional animation compression -- thats based on Dual Cubic Splines. Our hope is that you might consider using Motive as a high-performance back-end to your existing full-featured animation systems.

This initial release of Motive is feature-light since we focused our early efforts on doing something simple very quickly. We support procedural and spline-based animation, but we dont yet support data export from animation packages like Blender or Maya. Motive 1.0 is suitable for props -- trees, cameras, extremities -- but not fully rigged character models. Like all FPL technologies, Motive is open source and cross-platform. Please check out the discussion list, too.

What’s Fun Propulsion Labs at Google?

You might remember us from such Android games as Pie Noon, LiquidFun Paint, and VoltAir, and such cross-platform libraries as MathFu, LiquidFun, and FlatBuffers.

Want to learn more about our team? Check out this recent episode of Game On! with Todd Kerpelman for the scoop!


* Fun Propulsion Labs is a team within Google thats dedicated to advancing gaming on Android and other platforms.

Read More..

CX 30 Mini Quadcopter with FPV cam

| 0 comments |


Read More..

charity water unifies a global team with Chromebox for Meetings

| 0 comments |


Editors note: Today’s post comes from Ian Cook, head of IT at charity: water, a non-profit organization that provides clean and safe drinking water to people in developing nations. Learn about how the organization is using Chromebox for meetings to keep the team connected, from its New York City HQ to onsite in Cambodia. 

At charity: water, our mission is to bring clean and safe drinking water to every person on the planet. We have a “100 percent model,” which means every dollar donated goes directly to the field to fund clean water projects. This is made possible by a small group of passionate and dedicated supporters who cover all of our operating costs: everything from staff salaries, to flights to the field, to the ink in our printer.

At charity: water transparency is one of our core values, and with the help of Google we maintain transparency in two major ways. We use the Google Maps APIs to show every supporter exactly what weve done with their donation by giving them the GPS coordinates, photos and community information of the exact projects they made possible. We also rely heavily on tools like Chromebox for Meetings to communicate with our global team; our headquarters is in New York, but we have staff that work remotely in Europe, Asia, and Africa.

We switched to Chromebox for Meetings after testing different products, and gathering feedback from our employees. They found Chromebox for Meetings to be the best solution: powerful, easy to use and seamlessly integrated with Google Apps. When we moved into a new, custom office space, we opted to include screens connected to Chromebox for Meetings in all nine of our conference rooms.

We like when technology enables, rather than interrupts, our natural flow of working. At any time, more than half our conference rooms are booked for virtual meetings, allowing us to connect instantly with colleagues around the world. We even have a 48-inch TV mounted at standing height on a media cart, which we move into the common area for company wide meetings. Remote employees can join via Hangouts and participate as if they were standing beside their colleagues. In fact, our first UK-based employee is connected with our New York City headquarters on Google Hangouts almost every day.

With simpler video conferencing, we’ve improved work-life balance by giving everyone, from interns to executive staff, more flexibility to work from anywhere at any time. Chromebox for Meetings is easy to scale and mobile-friendly, which is important since travel is core to what we do. Using Hangouts in conjunction with Chrome device management also allows us to help out employees with IT issues in real time, which is essential for a global team that often works remotely. I can share screens and fix problems whether at the office, at home or on the road.

Our team’s made up of excited, passionate people, running a non-profit much like a fast-paced technology startup. We need tools that help us work more collaboratively, even when a number of our team members are dispersed across the globe. We’ve even started an initiative to hire the best talent for the job, regardless of physical location. We wouldn’t be able to do this without powerful video conferencing technology and work tools that enable mobility. With Chromebox for Meetings and Google Apps, we can work better at achieving our mission while maintaining the transparency that’s at the core of our values.
Read More..

Converga brings together on site and remote employees virtually with Chromebooks

| 0 comments |


Editors note: Today’s guest blogger is Douglas Grgas at Converga, a business process outsourcing company based in Australia, providing digital mailroom, document processing and a variety of other managed services. Converga introduced Chromebooks to ensure better availability of internal services for remote employees, as well as a new platform for office staff.

When employees are based in many different locations, whether it’s at corporate offices or customer sites, it’s important to make all employees feel connected to headquarters. As a company with over 1,300 resources at more than 150 customer locations, we’ve addressed this challenge firsthand by providing employees with technology to stay in touch. Many of our employees spend the majority of their time at our customers’ offices providing managed services, such as operating mailrooms or converting paper documents to digital versions.

To bridge the gap between off-site and on-site communications, account managers visited customer sites regularly to communicate with remote employees, and our CEO carried out a roadshow, where he talked about company performance, new customer wins and progress on global objectives, but off-site employees still felt disconnected from central operations on a day-to-day basis.

Our biggest ongoing challenge with keeping employees connected while at customer sites was having to rely on customers’ devices and networks. Often employees couldn’t access email and the Internet, which resulted in being disconnected from corporate communications and reduced productivity. We wanted everyone to feel connected and productive wherever they were, and to have access to technology that simplified their activities.

We chose Chrome for Converga because of its simplicity of use and seamless remote management. We liked that Chromebooks are sleek and lightweight like a tablet, but have a keyboard for easy data entry.

Beyond the device, the central Chrome Device Management service allows easy deployment and controls, device security, network connectivity and integrated apps across Converga’s fleet of Chromebooks, all with the additional benefit of leveraging Google’s Support services.

Also, since Chromebooks integrate with Citrix XenApp, which virtually delivers existing apps through the Chrome Browser, we don’t have to repurchase or rewrite existing applications.

Converga has deployed Chromebooks at 50 customer sites across Australia and New Zealand during the past year. We’ve also deployed numerous devices, many utilizing the Citrix XenApp, at our corporate offices.

Now more than 500 employees have a two-way channel to communicate with headquarters, using a reliable and standard operating environment, which IT can manage remotely. Employees can quickly search for information using Chrome, record notes in Google Docs and communicate with employees at other sites via Hangouts and Google+, all accessible via a simple to use, remotely managed, lightweight device.

Chromebooks are the foundation that helps our employees connect with each other and senior management. We use our company Google Site, which acts as our intranet, to do everything from feature employees of the month to communicate company perks and share performance metrics. Employees also use the intranet to share updates about customer sites, so the rest of the business can stay connected. For example, around Christmas, our employees post pictures of how their customers have decorated for the holidays. Each time an employee does something related to the Converga tree, a tree that represents our company values, he or she is asked to share the activity with the rest of the community.

Introducing Chromebooks has supported our goal of making all employees, regardless of their location, feel united. As we continue to introduce new technologies, our employees are more engaged in their work and empowered to share their stories with one another.
Read More..

Monitor your Windows cpu usage temperature with HWiNFO

| 0 comments |
Just tried HWiNFO to monitor Windows 10 CPU usage, temperature..., very nice:) Comprehensive Hardware Analysis, Monitoring and Reporting for Windows and DOS. FREEWARE!


In-depth Hardware Information
From a quick overview unfolding into the depth of all hardware components. Always up-to date supporting latest technologies and standards.

Real-Time System Monitoring
Accurate monitoring of all system components for actual status and failure prediction. Customizable interface with variety of options.

Extensive Reporting
Multiple types of reports, status logging and interfacing with other tools or add-ons.


~ link: http://www.hwinfo.com/


Read More..

QuakeƂ III on your TV with Cast Remote Display API

| 0 comments |

Posted by Leon Nicholls, Developer Programs Engineer and Antonio Fontan, Software Engineer

At Google I/O 2015 we announced the new Google Cast Remote Display APIs for Android and iOS that make it easy for mobile developers to bring graphically intensive apps or games to Google Cast receivers. Now you can use the powerful GPUs, CPUs and sensors of the mobile device in your pocket to render both a local display and a virtual one to the TV. This dual display model also allows you to design new game experiences for the display on the mobile device to show maps, game pieces and private game information.

We wanted to show you how easy it is to take an existing high performance game and run it on a Chromecast. So, we decided to port the classic Quake® III Arena open source engine to support Cast Remote Display. We reached out to ID Software and they thought it was a cool idea too. When all was said and done, during our 2015 I/O session “Google Cast Remote Display APIs for Games” we were able to present the game in 720p at 60 fps!

During the demo we used a wired USB game controller to play the game, but weve also experimented with using the mobile device sensors, a bluetooth controller, a toy gun and even a dance mat as game controllers.

Since youre probably wondering how you can do this too, heres the details of how we added Cast Remote Display to Quake. The game engine was not modified in any way and the whole process took less than a day with most of our time spent removing UI code not needed for the demo. We started by using an existing source port of Quake III to Android which includes some usage of kwaak3 and ioquake3 source code.

Next, we registered a Remote Display App ID using the Google Cast SDK Developer Console. There’s no need to write a Cast receiver app as the Remote Display APIs are supported natively by all Google Cast receivers.

To render the local display, the existing main Activity was converted to an ActionBarActivity. To discover devices and to allow a user to select a Cast device to connect to, we added support for the Cast button using MediaRouteActionProvider. The MediaRouteActionProvider adds a Cast button to the action bar. We then set the MediaRouteSelector for the MediaRouter using the App ID we obtained and added a callback listener using MediaRouter.addCallback. We modified the existing code to display an image bitmap on the local display.

To render the remote display, we extended CastPresentation and called setContentView with the game’s existing GLSurfaceView instance. Think of the CastPresentation as the Activity for the remote display. The game audio engine was also started at that point.

Next we created a service extending CastRemoteDisplayLocalService which would then create an instance of our CastPresentation class. The service will manage the remote display even when the local app goes into the background. The service automatically provides a convenient notification to allow the user to dismiss the remote display.

Then we start our service when the MediaRouter onRouteSelected event is called by using CastRemoteDisplayLocalService.startService and stop the service when the MediaRouter onRouteUnselected event is called by using CastRemoteDisplayLocalService.stopService.

To see a more detailed description on how to use the Remote Display APIs, read our developer documentation. We have also published a sample app on GitHub that is UX compliant.

You can download the code that we used for the demo. To run the app you have to compile it using Gradle or Android Studio. You will also need to copy the "baseq3" folder from your Quake III game to the “qiii4a” folder in the root of the SD card of your Android mobile device. Your mobile device needs to have at least Android KitKat and Google Play services version 7.5.71.

With 17 million Chromecast devices sold and 1.5 billion touches of the Cast button, the opportunity for developers is huge, and it’s simple to add this extra functionality to an existing game. Were eager to see what amazing experiences you create using the Cast Remote Display APIs.

QUAKE II © 1997 and QUAKE III © 1999 id Software LLC, a ZeniMax Media company. QUAKE is a trademark or registered trademark of id Software LLC in the U.S. and/or other countries. QUAKE game assets used under license from id Software LLC. All Rights Reserved

QIII4A © 2012 n0n3m4. GNU General Public License.

Q3E © 2012 n0n3m4. GNU General Public License.

Read More..

Learn top tips from Kongregate to achieve success with Store Listing Experiments

| 0 comments |

Originally posted on Android Developer blog

Posted by Lily Sheringham, Developer Marketing at Google Play

Editor’s note: This is another post in our series featuring tips from developers finding success on Google Play. We recently spoke to games developer Kongregate, to find out how they use Store Listing Experiments successfully. - Ed.

With Store Listing Experiments in the Google Play Developer Console, you can conduct A/B tests on the content of your store listing pages. Test versions of the text and graphics to see which ones perform best, based on install data.

Kongregate increases installs by 45 percent with Store Listing Experiments

Founded in 2006 by brother and sister Jim and Emily Greer, Kongregate is a leading mobile games publisher specializing in free to play games. Kongregate used Store Listing Experiments to test new content for the Global Assault listing page on Google Play. By testing with different audience sizes, they found a new icon that drove 92 percent more installs, while variant screenshots achieved an impressive 14 percent improvement. By picking the icons, screenshots, and text descriptions that were the most sticky with users, Kongregate saw installs increase by 45 percent on the improved page.

Kongregate’s Mike Gordon, VP of Publishing; Peter Eykemans, Senior Producer; and Tammy Levy, Director of Product for Mobile Games, talk about how to successfully optimise mobile game listings with Store Listing Experiments.


Kongregate’s tips for success with Store Listing Experiments

Jeff Gurian, Sr. Director of Marketing at Kongregate also shares his do’s and don’ts on how to use experiments to convert more of your visitors, thereby increasing installs. Check them out below:

Do’s Don’ts
Do start by testing your game’s icon. Icons can have the greatest impact (positive or negative) on installs — so test early! Don’t test too many variables at once. It makes it harder to determine what drove results. The more variables you test, the more installs (and time) you’ll need to identify a winner.
Do have a question or objective in mind when designing an experiment. For example, does artwork visualizing gameplay drive more installs than artwork that doesn’t? Don’t test artwork only. Also test screenshot ordering, videos, and text to find what combinations increase installs.
Do run experiments long enough to achieve statistical significance. How long it takes to get a result can vary due to changes in traffic sources, location of users, and other factors during testing. Don’t target too small an audience with your experiment variants. The more users you expose to your variants, the more data you collect, the faster you get results!
Do pay attention to the banner, which tells you if your experiment is still “in progress.” When it has collected enough data, the banner will clearly tell you which variant won or if it was a tie. Don’t interpret a test where the control attribute performs better than variants as a waste. You can still learn valuable lessons from what “didn’t work.” Iterate and try again!

Learn more about how Kongregate optimized their Play Store listing with Store Listing Experiments. Learn more about Google Play products and best practices to help you grow your business globally.

Read More..